


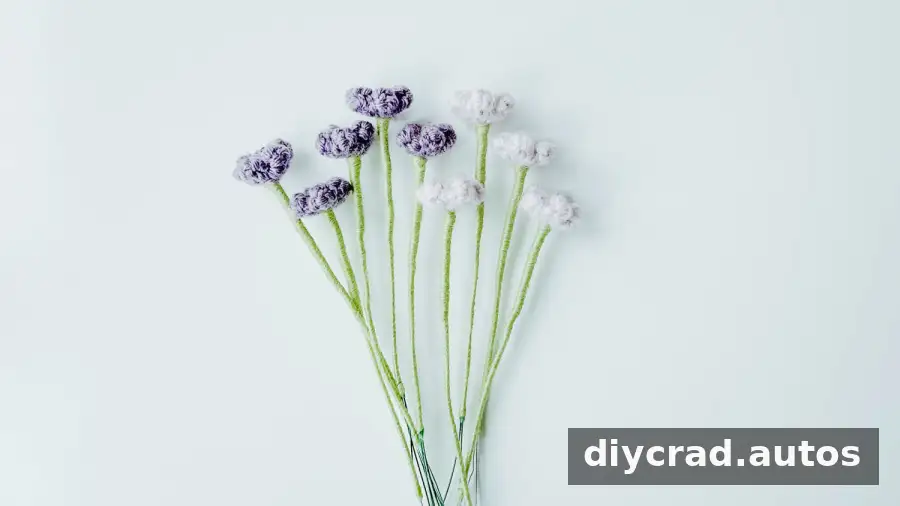
This crochet baby’s breath pattern creates nine tiny flowers that can bring a soft, delicate accent to handmade bouquets and other crochet projects. The design uses simple stitches, yarn stamens, and wire stems, with step-by-step instructions for making and assembling the flowers. The finished sprigs are intended as decorative pieces, rather than toys.

Why Make Crochet Baby’s Breath?
Baby’s breath, also known as Gypsophila, is often associated with innocence, purity, and everlasting love. Its small blooms and airy appearance make it a popular bouquet filler. A crocheted version offers a lasting, handmade alternative that can be arranged with other yarn flowers.
- Delicate texture: The small petals add detail without overpowering larger flowers.
- Flexible color choices: Try light pink, white, beige, blue, or yellow, or combine shades to suit your project.
- Useful as an accent: Arrange the sprigs among larger crocheted flowers to add depth and a lighter visual effect.

Ways to Use Crocheted Baby’s Breath
These flowers can be arranged in a small bouquet or used as decorative accents. Consider adding them to shawls, blankets, hats, clothing, or bags, taking care to attach each flower securely. They can also be incorporated into wall hangings, dream catchers, and nursery decorations.
For a soft, romantic bouquet, pair the sprigs with blush pink roses or white lisianthus. For stronger contrast, combine them with dark burgundy roses or eucalyptus foliage. Copper-colored foliage can complement a rustic arrangement.
Safety note: This pattern includes wire, adhesive, and small parts. Keep the finished decoration out of the reach of babies and young children; it is not a baby toy or a suitable item for a crib or mobile within a child’s reach.
Materials and Equipment
- Yarn in four colors: dark purple, light purple, yellow, and green
- 2.5 mm crochet hook
- Flower rod measuring 16 inches long and 0.08 inches in diameter (40 cm × 2 mm)
- Iron wire measuring 0.02 inches in diameter (0.4 mm)
- Scissors
- Stitch marker
- Darning needle
- Hot-melt adhesive
Difficulty and Stitch Abbreviations
This project is rated intermediate because making and securing the yarn stamens and managing the loose ends require care. A beginner can also work through it slowly, using the video as a visual guide and checking each step before moving on.
- Ch: Chain
- Sc: Single crochet
- Ss: Slip stitch
Pattern Notes
- The instructions use US crochet terms.
- Work carefully, especially when looping the yarn around the ring and securing the ends.
- Additional notes are shown in italics.
How to Crochet Baby’s Breath
Make the Flowers (Make 9)

- Begin with a magic ring.
- Chain 3, then work 2 sc in the second stitch from the hook. Slip stitch into the original magic ring.
- Repeat the sequence four more times to create five petals. Work 1 ss, cut the yarn, and use a darning needle to hide the tail.
Make the Stamens (Make 9)

- Cut a piece of yellow yarn about 10 cm long for each stamen.
- Form a loop and wrap the yarn around the ring five times. Knot the loop in place when finished.
Keep the wraps even and secure the knot firmly so the stamen holds together during assembly.
Assemble the Flowers
- Use the crochet hook to pull a stamen through the center of a flower.
- Tie the wire to the existing yarn at the stamen. Secure the tie, then fold the wire twice.
- Use another length of yarn to cover the stem neatly. Repeat for the remaining eight flowers, then wrap the stems of three flowers together with yarn.
- Place the flower stems in the flower rod and arrange them as desired.
Handle the wire carefully while assembling, and use hot-melt adhesive only with appropriate care. Allow any adhesive to cool and set before arranging or displaying the finished piece.
Video Tutorial
Use the video as a visual reference for the flower, stamen, and assembly steps. Turn on subtitles in the video settings if you need them.
Finishing Thoughts
Crochet baby’s breath is a small project that can add texture and a delicate touch to bouquets, decorations, and other handmade work. Make nine flowers using the pattern, then arrange their stems to suit your display. Experiment with the suggested color options to coordinate the sprigs with the rest of your project, and keep the finished decoration safely out of children’s reach.


