

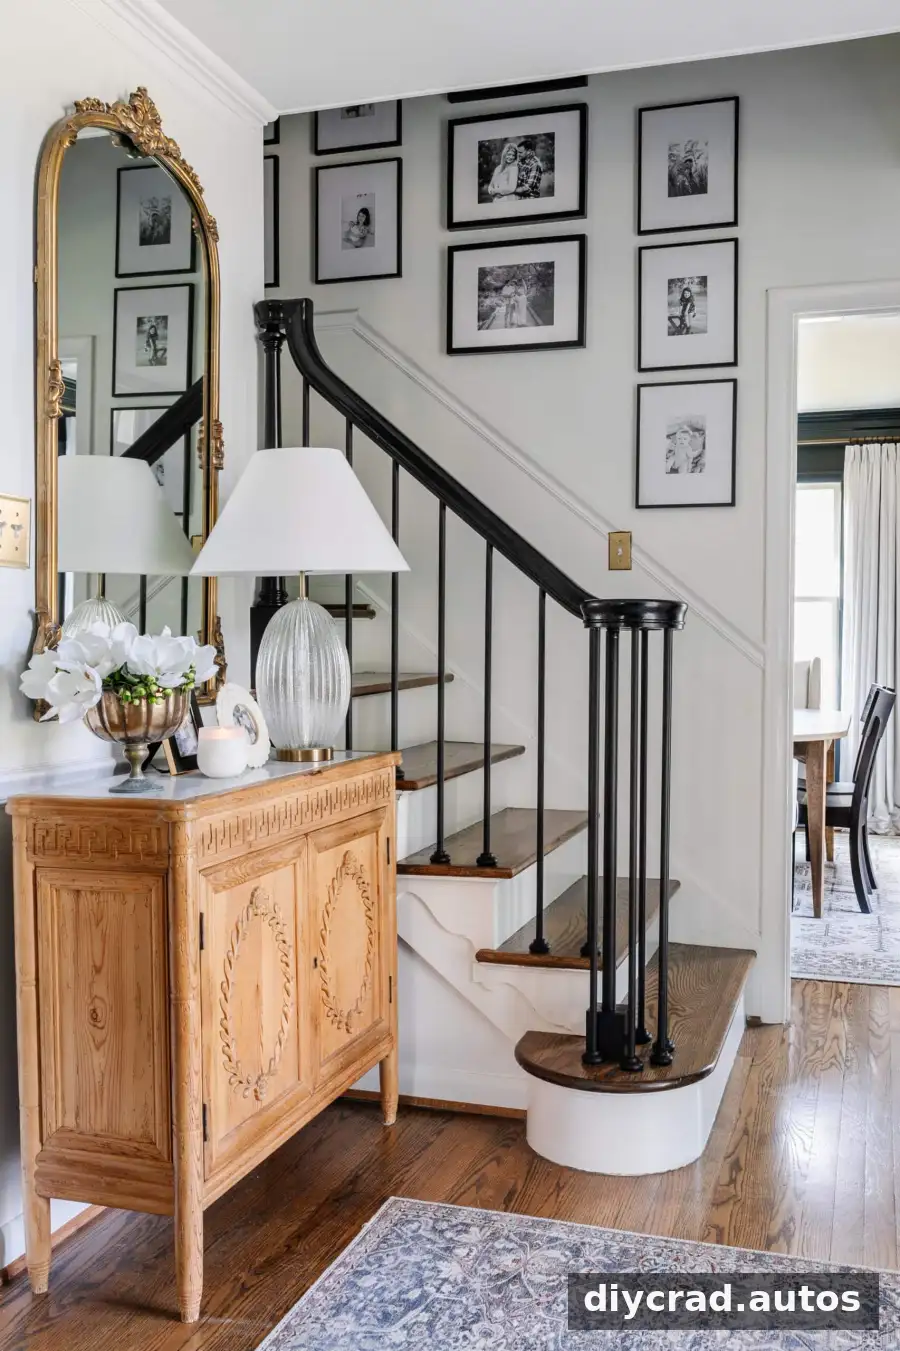
Learning how to replace stair spindles can refresh an outdated staircase without replacing the entire railing. With careful measuring, the right tools, and a little preparation, changing the balusters and repainting the handrail can be a practical DIY makeover. The project described here cost $383 for tool rental, materials, and supplies; your total will depend on the staircase and the parts you choose.
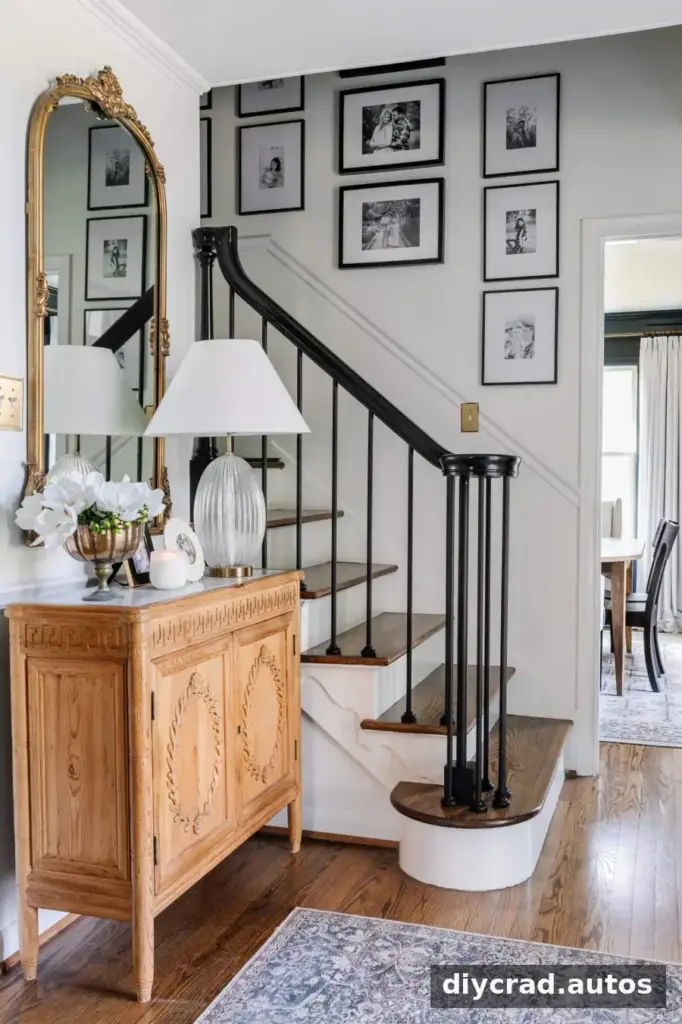
A railing can be structurally sound yet no longer suit the look of a home. Replacing only the spindles may offer a less expensive update than installing a complete new banister, although the existing handrail, posts, and attachment points need to be assessed before work begins.
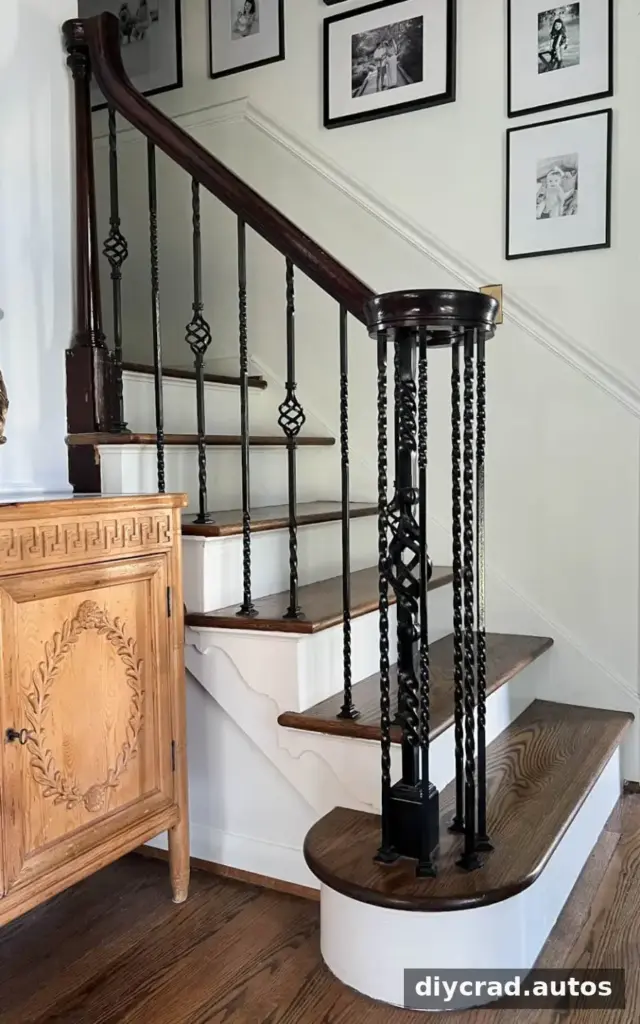
Is It Easy to Replace Stair Spindles?
For many staircase systems, spindle replacement is an intermediate DIY project. The difficulty depends on how the existing parts are fastened, whether they are wood or metal, and whether the new pieces fit the existing holes. Metal balusters generally take more cutting effort than wood ones.
Before starting, inspect the railing for screws, nails, adhesive, or epoxy. Check that the handrail is stable and plan how to keep it supported while balusters are removed. If the railing feels loose or the work affects its structural support, consult a qualified professional.
Tools for Removing Iron Balusters
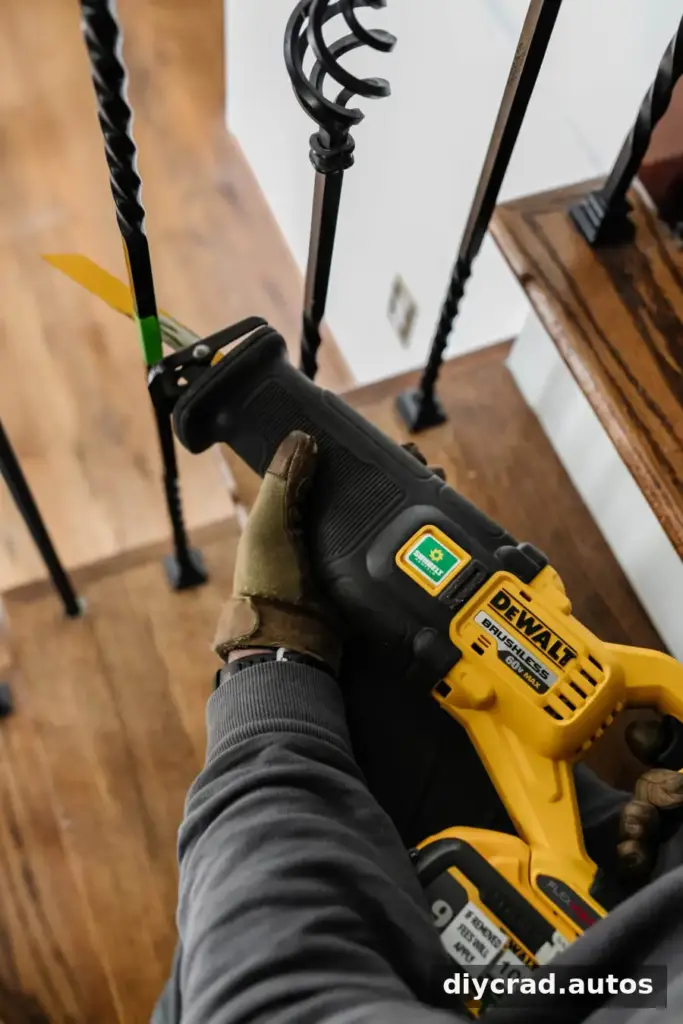
A high-powered reciprocating saw can make cutting iron balusters more manageable. Renting a specialty tool for a one-time project may cost less than purchasing one. Use a metal-cutting blade for iron and a wood-cutting blade for wooden spindles.
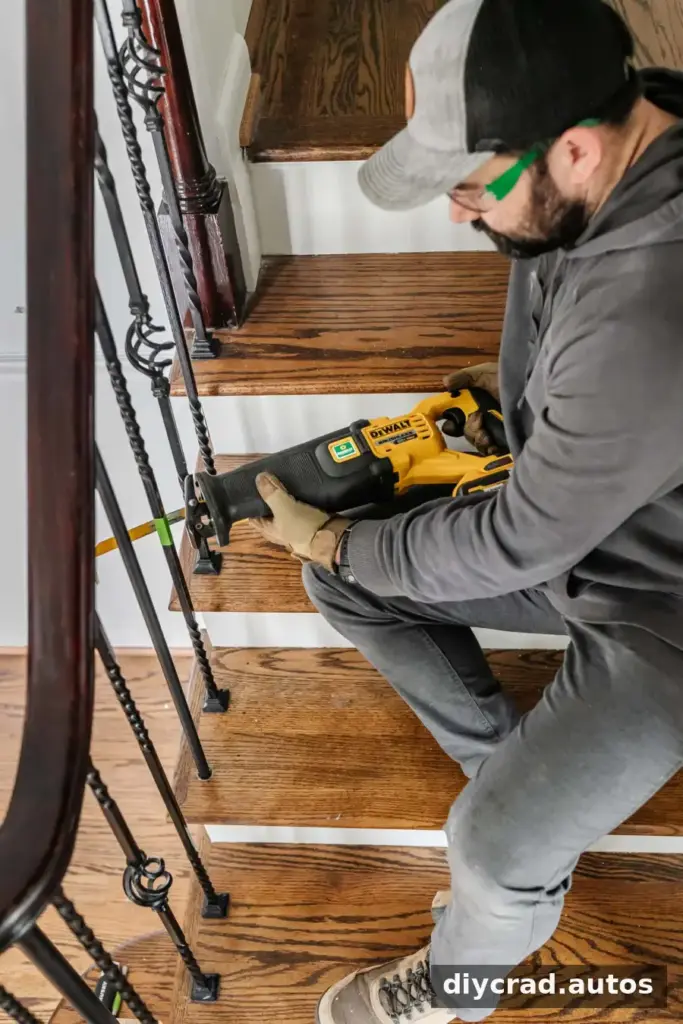
Wood is generally easier to cut and repair than metal. The same basic replacement approach can be used for different baluster materials, but always choose blades and cutting methods suited to the material. Keep the work area clear and use appropriate safety equipment.
Metal Balusters vs. Wood Balusters
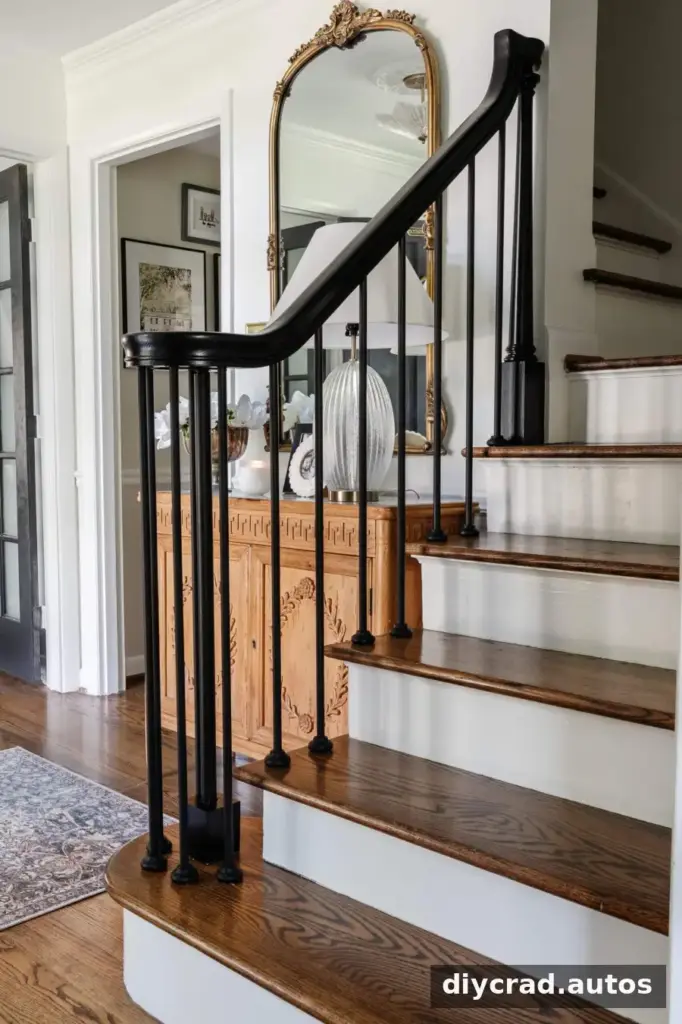
Metal and wood balusters can create very different styles, and railing components such as the handrail, newel post, and balusters can be selected to coordinate. Wood is typically simpler to cut and adjust, while metal may require a more powerful saw and fresh blades.
Choose replacement parts that match the staircase’s layout and attachment points. Stair shoes should suit both the baluster diameter and the angle at which the baluster meets the tread or stringer.
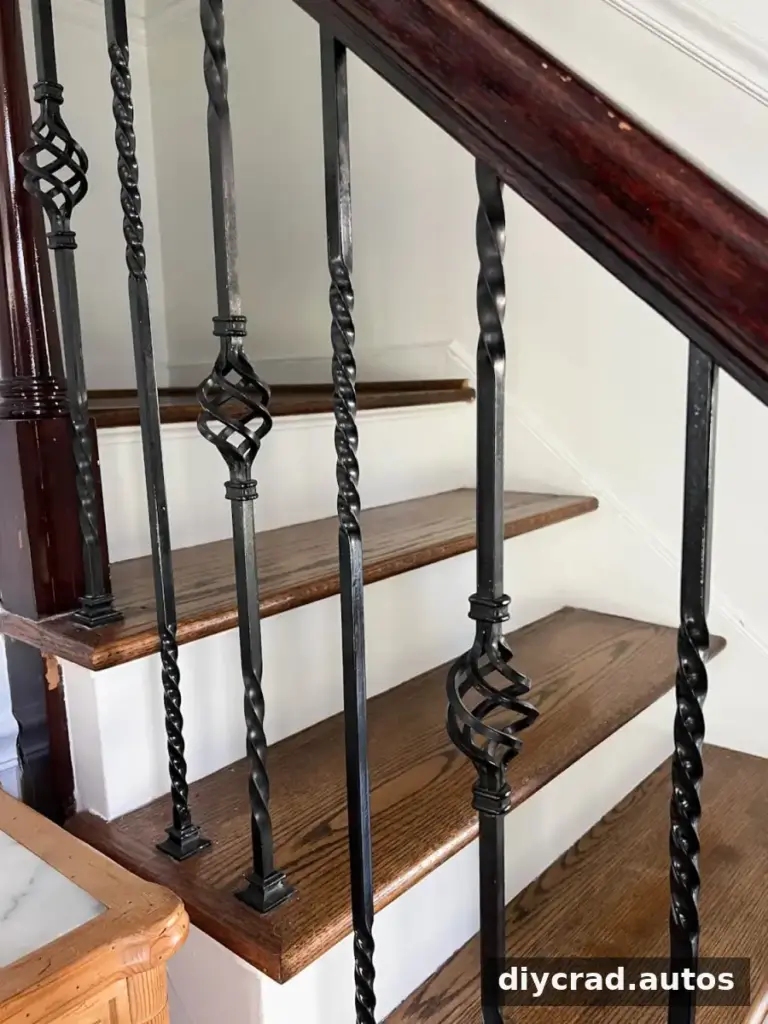
How to Replace Stair Spindles: Tools and Materials
Tools
- Reciprocating saw: A high-powered model, such as a 60 Volt cordless reciprocating saw, works well for iron balusters.
- Reciprocating saw blades: Use metal-cutting blades for iron and wood-cutting blades for wood. The project’s tool list recommends changing blades after every 3–4 balusters; during removal, check blade sharpness often and replace dull blades promptly.
- Shop vacuum
- Drill
- Drill paddle bit: Choose a size suited to the newel post if replacing it.
- Forstner bit: Match the size to the balusters or existing holes.
- Phillips bit and pliers
- Hacksaw or miter saw
Supplies
- Replacement stair balusters; the project used 5/8-inch plain round powder-coated metal balusters.
- Stair shoes that match the baluster diameter and style. Use flat shoes where balusters meet a step at 90 degrees, or angled shoes where they meet an angled stringer.
- Optional: A newel post and 4×4 wood block if replacing the existing post.
- Speed square, four 2-inch self-drilling wood screws, and 3/4-inch self-drilling wood screws.
- Wood filler, heavy-duty construction adhesive, painter’s tape, and pencil.
- Bonding primer, waterborne alkyd paint in satin, a professional-quality 2-inch angled brush, fine-grit sandpaper, and tack cloth.
- Safety gear: work gloves, safety glasses, and closed-toe shoes.
A second person can help steady components, but both people should remain clear of the saw blade and follow the tool manufacturer’s safety instructions.
Step 1: Remove the Old Balusters
First, determine how each baluster is attached. Remove accessible screws or nails with a drill or pliers. If the pieces are glued in, cutting may be necessary. Wrap painter’s tape around each baluster and number them in order; the labels make the old pieces useful as measurement references later.
Cut through each baluster near the taped area with a reciprocating saw and the correct blade. Ask a helper to support the upper section to reduce pressure on the handrail. Keep the helper well behind the saw, and direct the cut away from them. After cutting, gently wiggle the ends free. Pliers can help loosen stubborn adhesive.
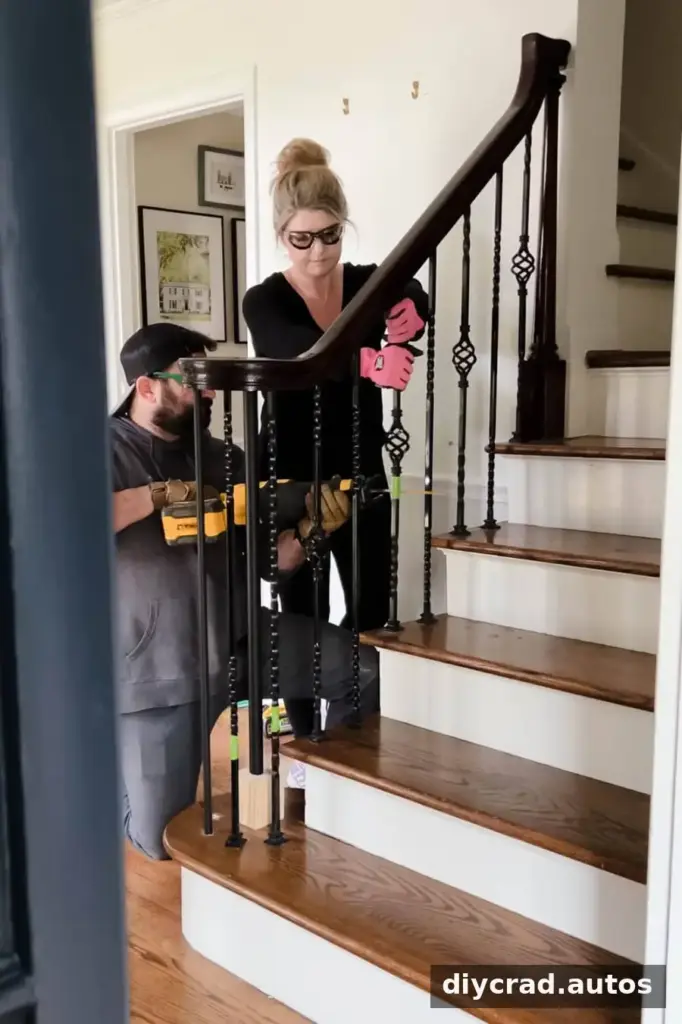
During removal, replace a dull blade rather than forcing it through the material. The project instructions also recommend changing blades after every 2–3 balusters. Vacuum metal fragments regularly and keep them away from hands and feet.
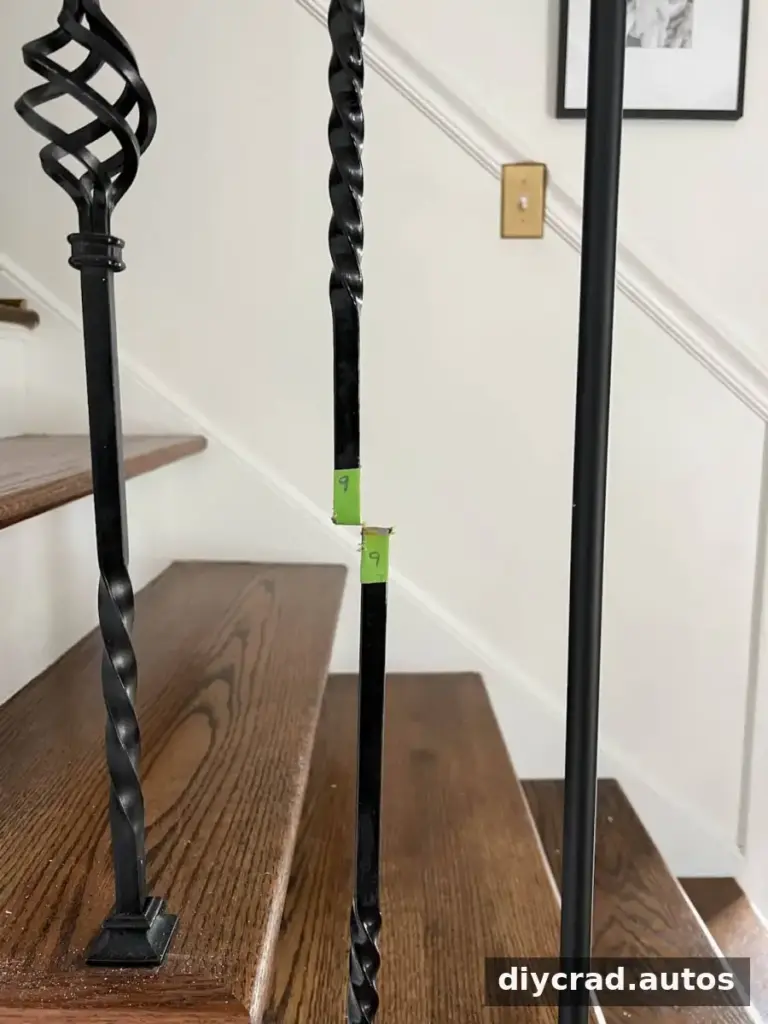
Set the numbered old balusters aside in order. If the newel post will also be replaced, remove only one or two balusters at first and proceed to the newel-post work while most of the railing support remains in place.
Step 2: Clean and Check the Existing Holes
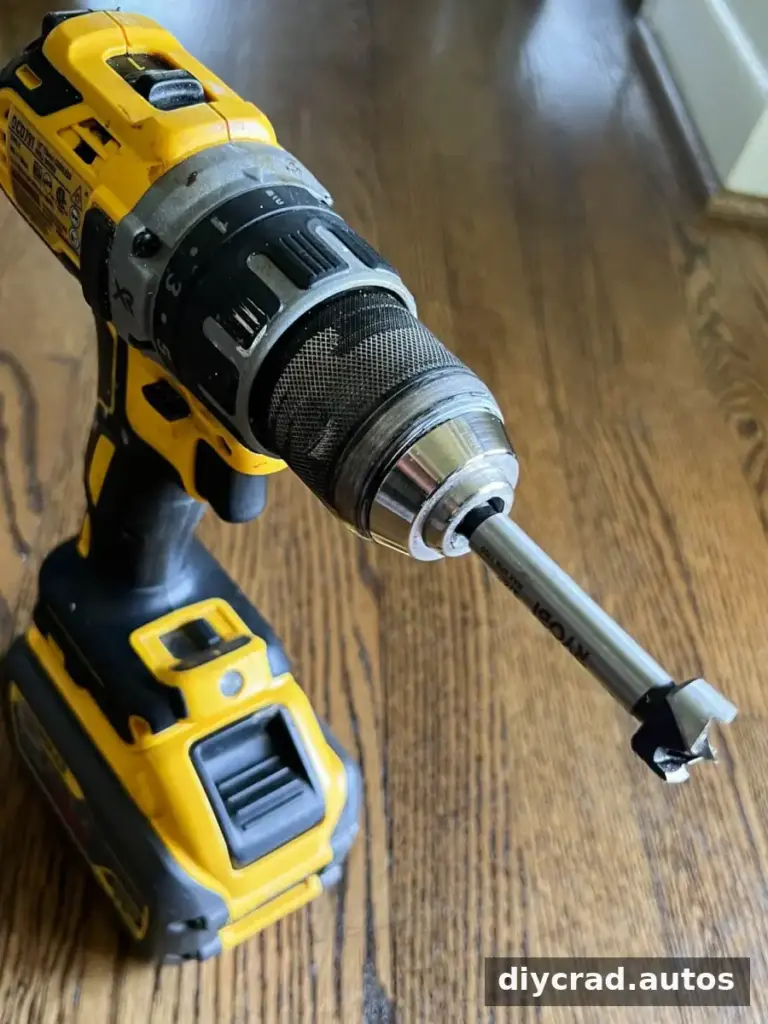
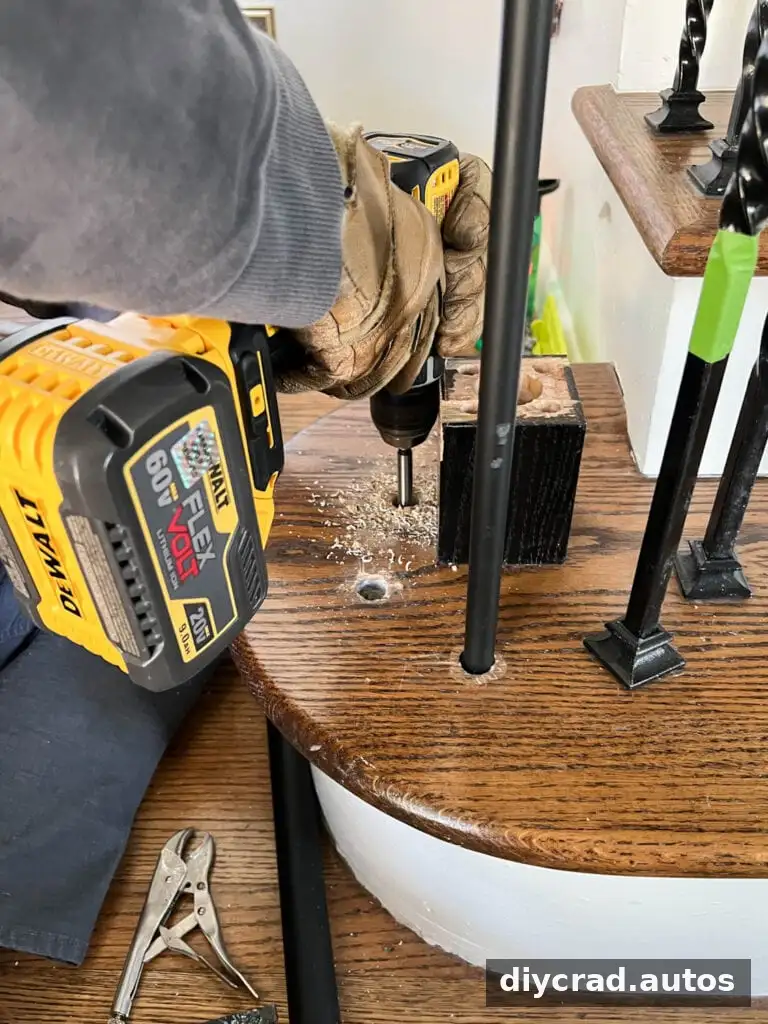
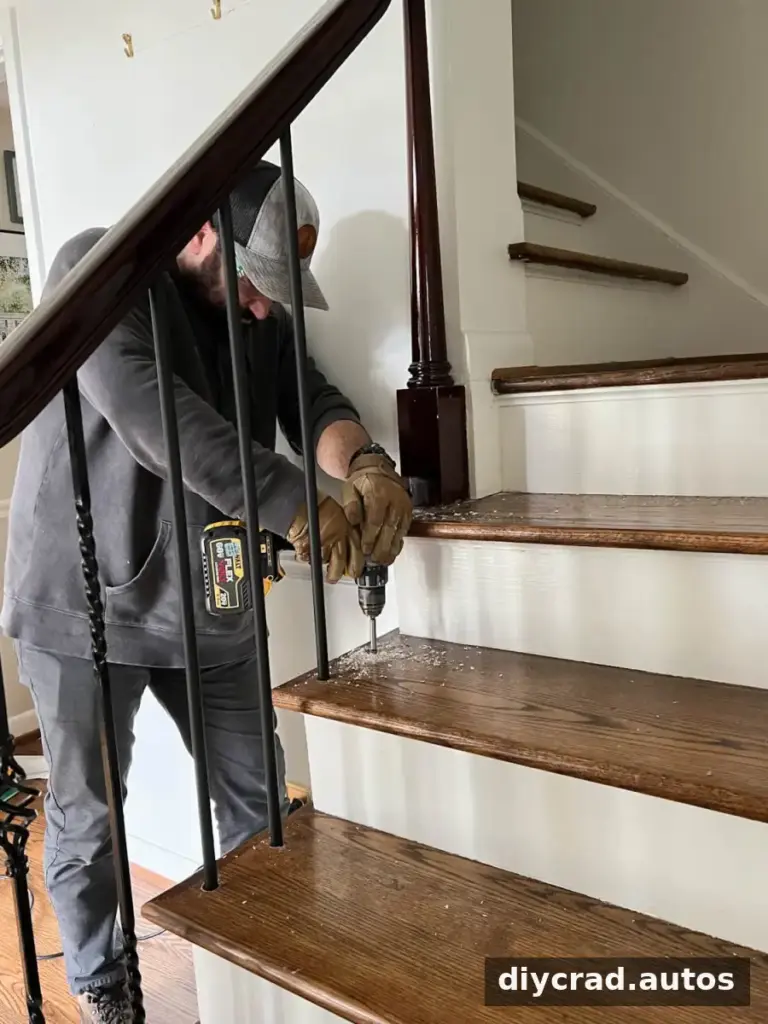
Reusing the original spacing and holes can simplify installation when the new balusters are a similar size. Clear out old adhesive or epoxy with a Forstner bit sized to the holes. It can make a cleaner opening in wood than a paddle bit. Enlarge holes only as needed to fit the replacement parts.
If a hole is wider than the new baluster, a correctly sized stair shoe may conceal the opening, provided the connection remains secure. Check that the wood around each hole is sound before continuing.
Step 3: Measure and Cut the New Balusters
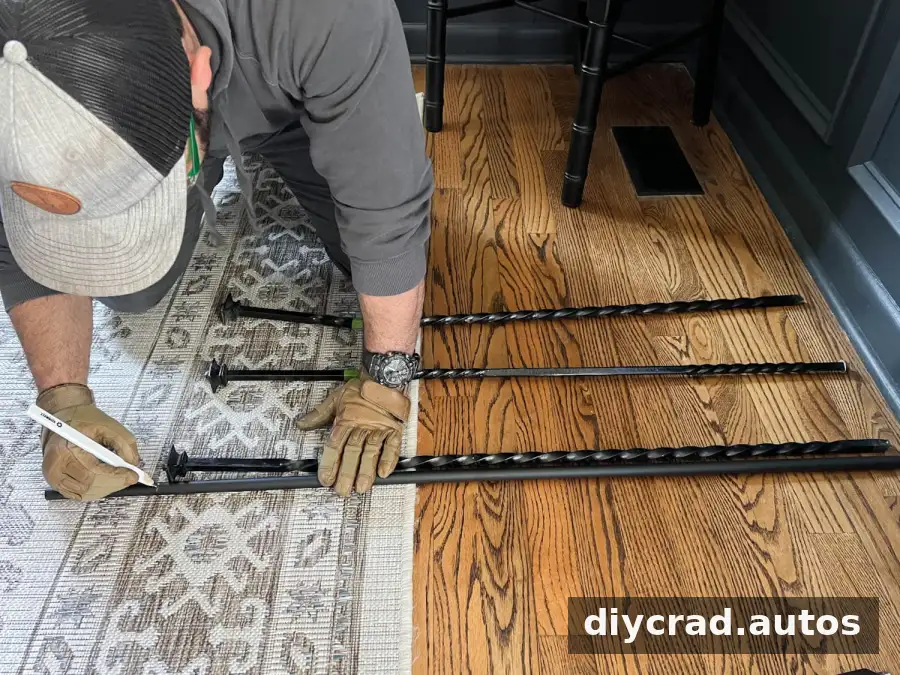
Use the numbered old pieces as templates to mark the replacement balusters. If the old pieces cannot be used as guides, measure from the top of each tread to the underside of the handrail and add an inch, as in this project’s measuring method. Verify each measurement before cutting because stair openings can vary.
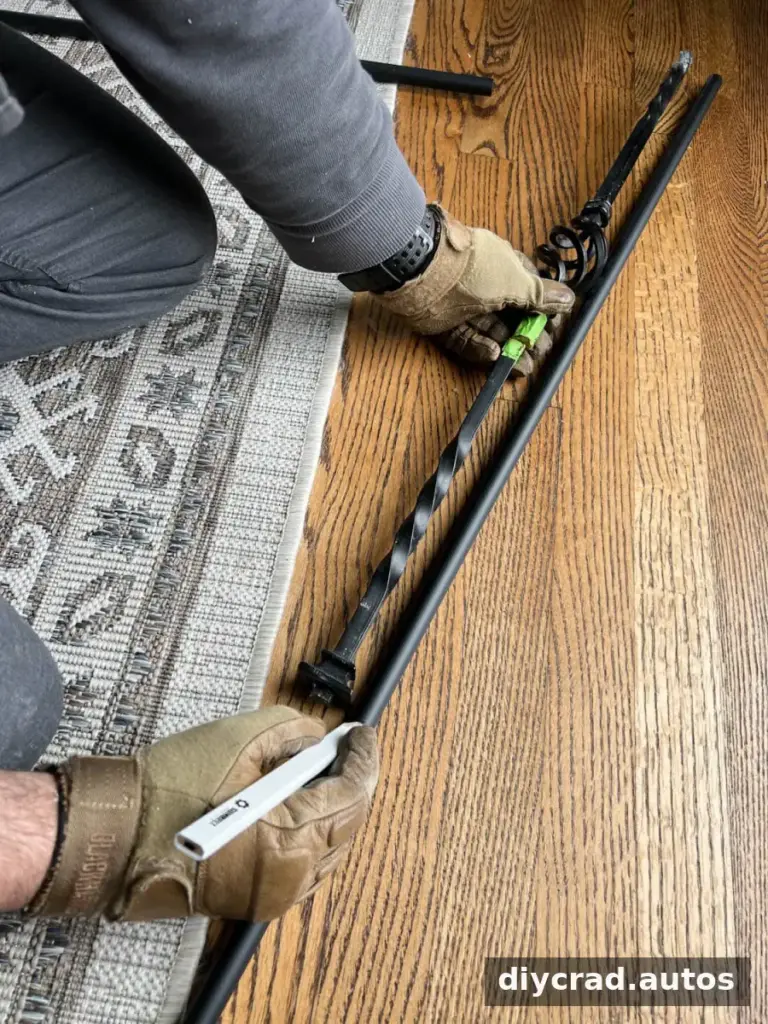
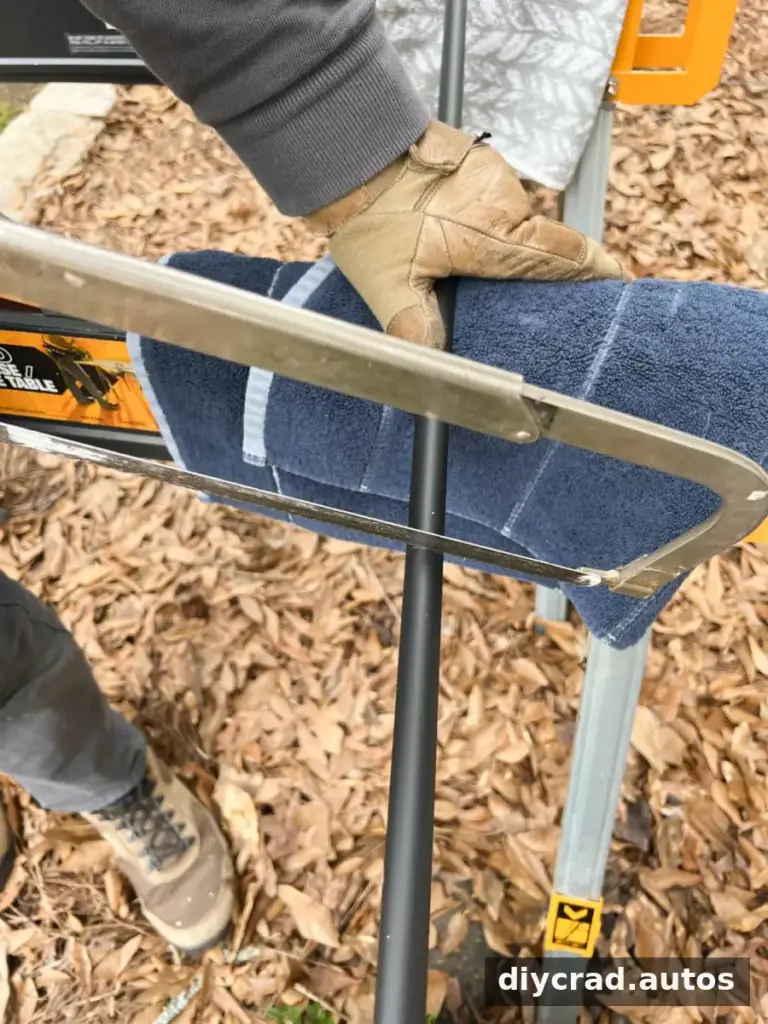
Cut new iron spindles with a miter saw or hacksaw; a regular hand saw can cut wooden spindles. Protect finished metal surfaces from scratches while supporting the pieces during cutting.
Test-fit every spindle before applying adhesive. Once the fit is confirmed, remove the spindles so the handrail can be painted without working around them.
Step 4: Replace the Newel Post if Needed
This step is optional. If the existing newel post does not match the new balusters, it may be replaced, but keep most of the balusters in place while working so the handrail retains support. Remove only the pieces needed to access the post.
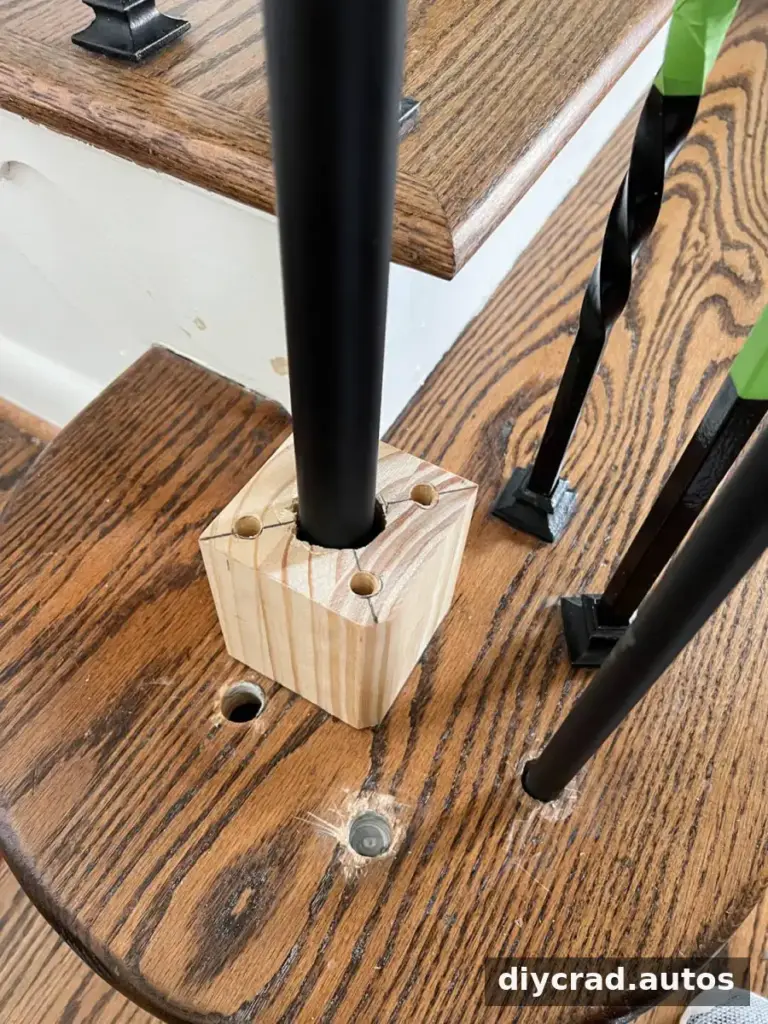
Remove the old post using an approach similar to the baluster removal. In this project, the iron post was attached to a wooden block screwed to the tread. After taking out the post, the wooden cap was cut away and the screws were removed to expose the post opening.
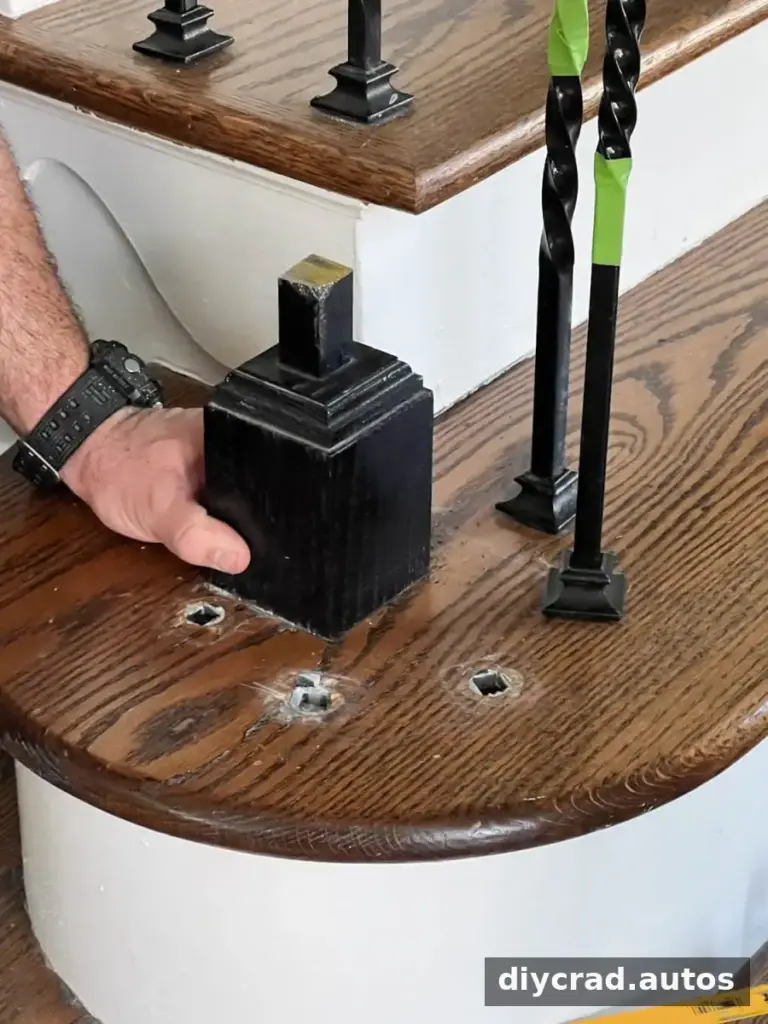
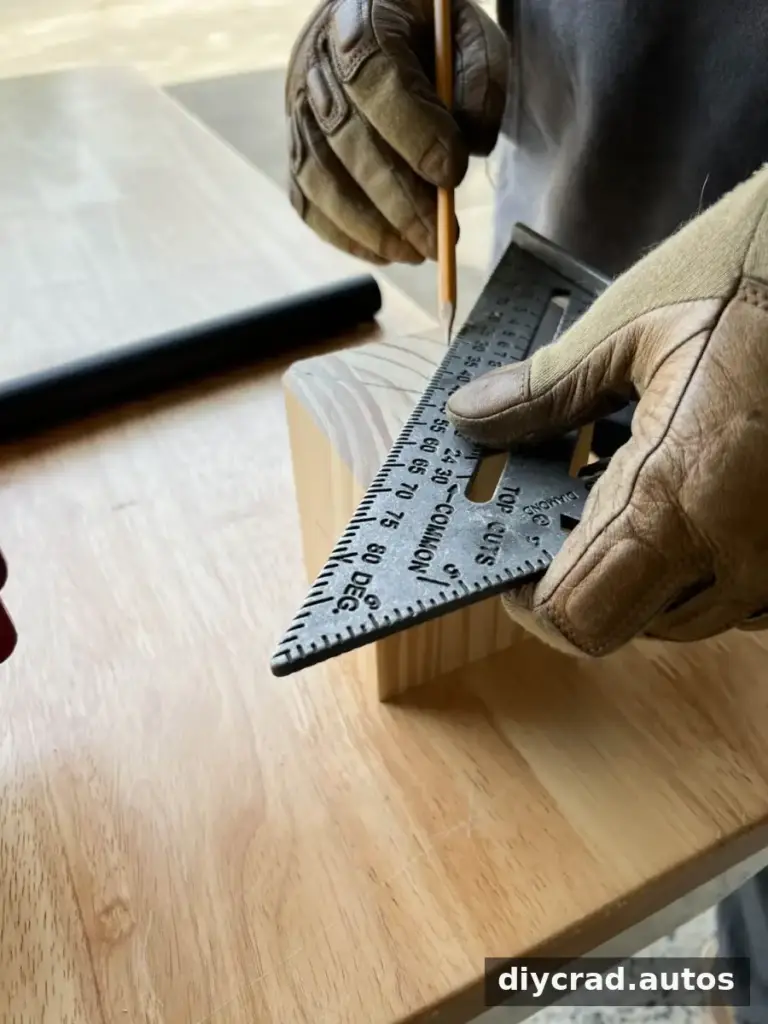
To prepare a new 4×4 block, mark an X with a speed square to locate its center. Position the newel post over the center and trace its outline as a drilling guide.
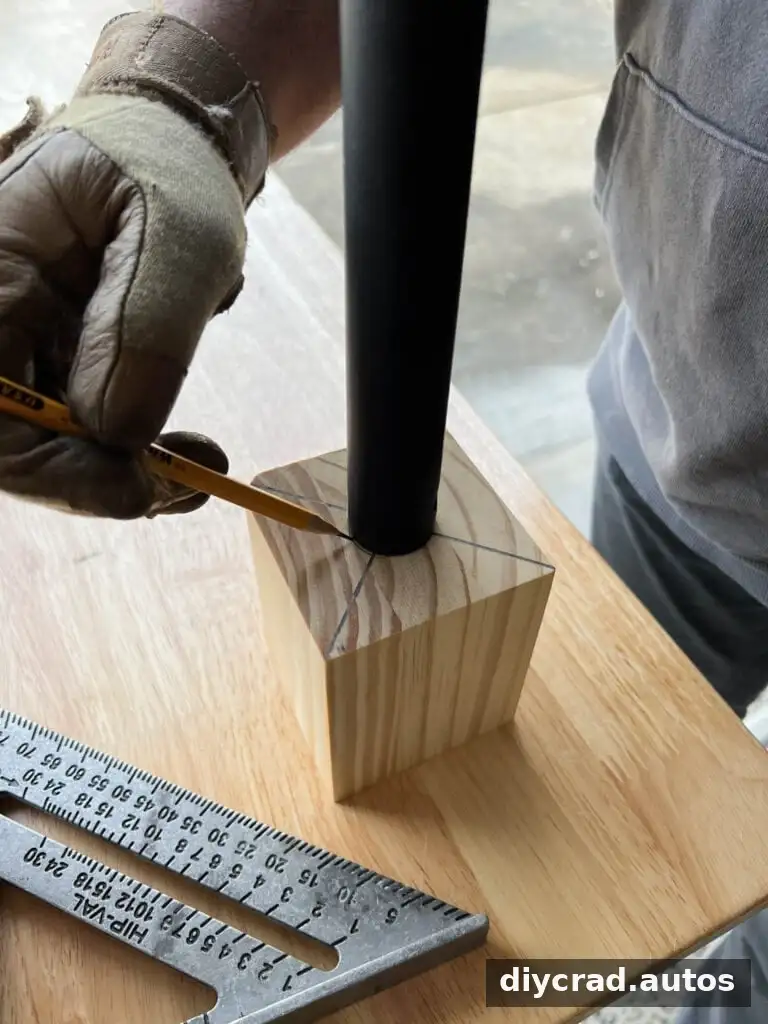
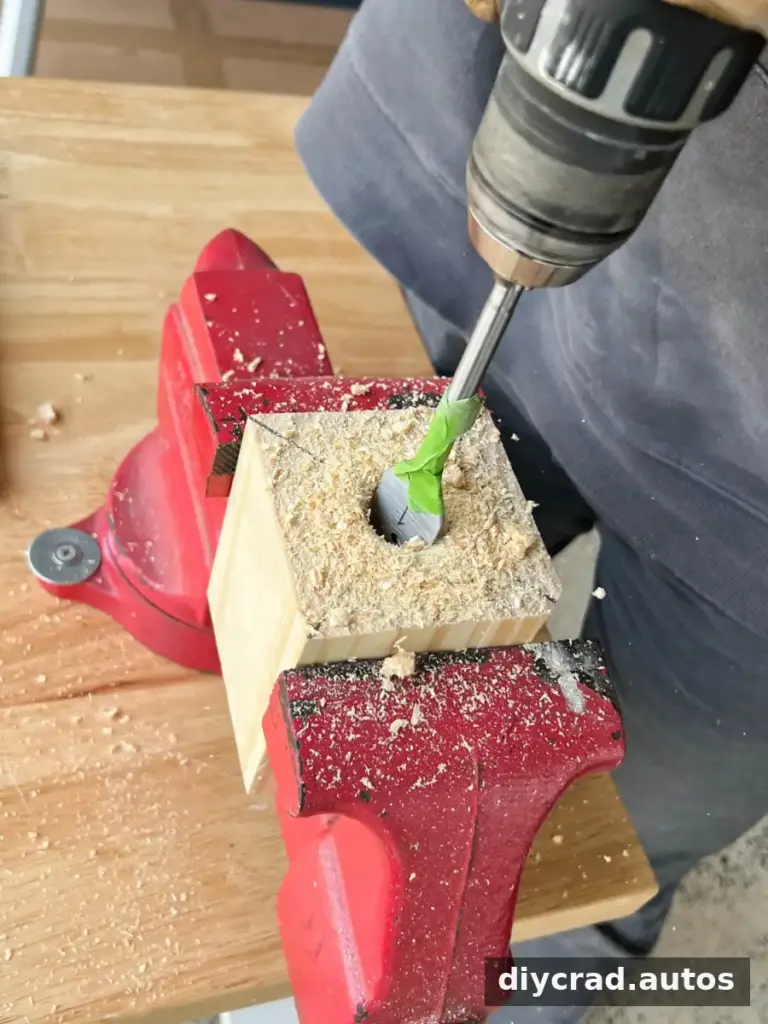
Use a paddle bit to make the post opening. Drill four pilot holes halfway through the block with a regular drill bit. Set the post into the block and handrail, then fasten the block to the tread with four 2-inch wood screws.
Fill the screw holes with wood filler and apply construction adhesive in the post openings in the block and handrail. If the block needs painting, leave nearby balusters out until sanding, priming, and painting are complete.
Step 5: Prime and Paint the Handrail
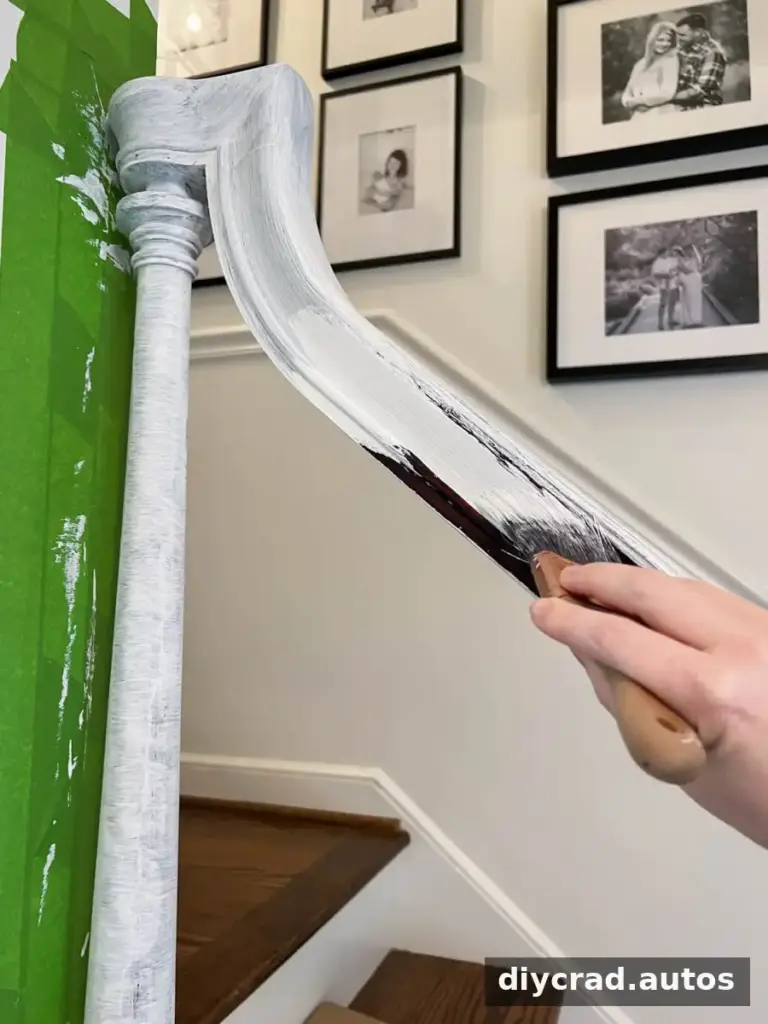
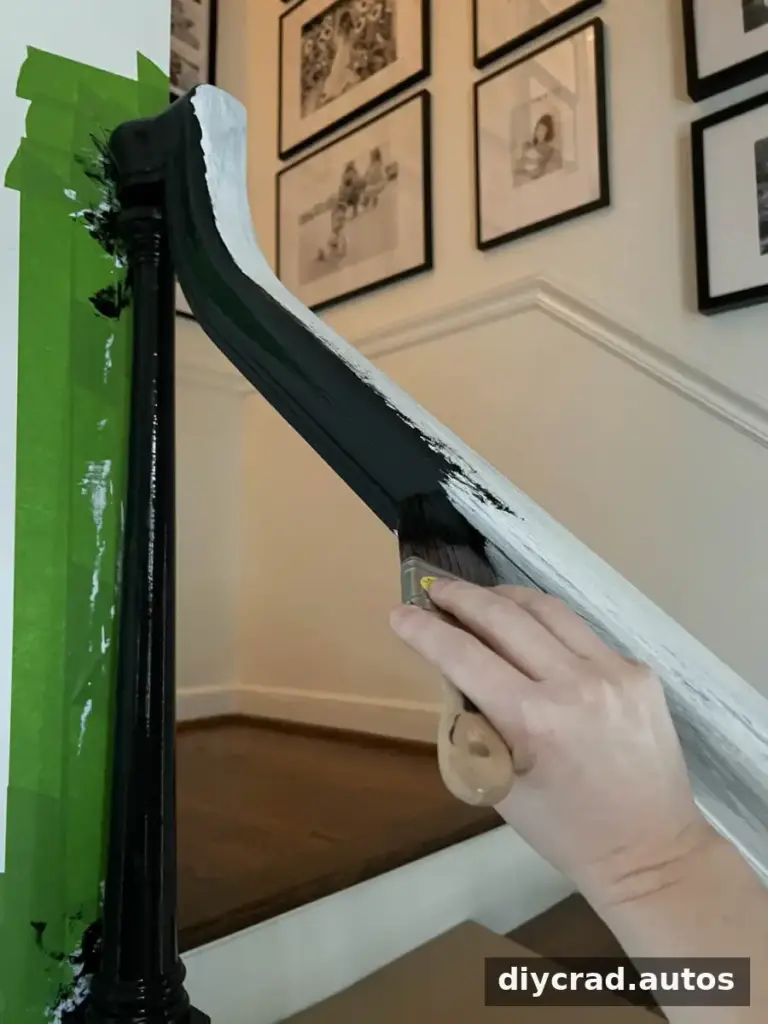
Painting before reinstalling the balusters makes it easier to reach the full handrail. Lightly sand the surface, then remove dust with a tack cloth. Apply bonding primer with a quality 2-inch angled brush.
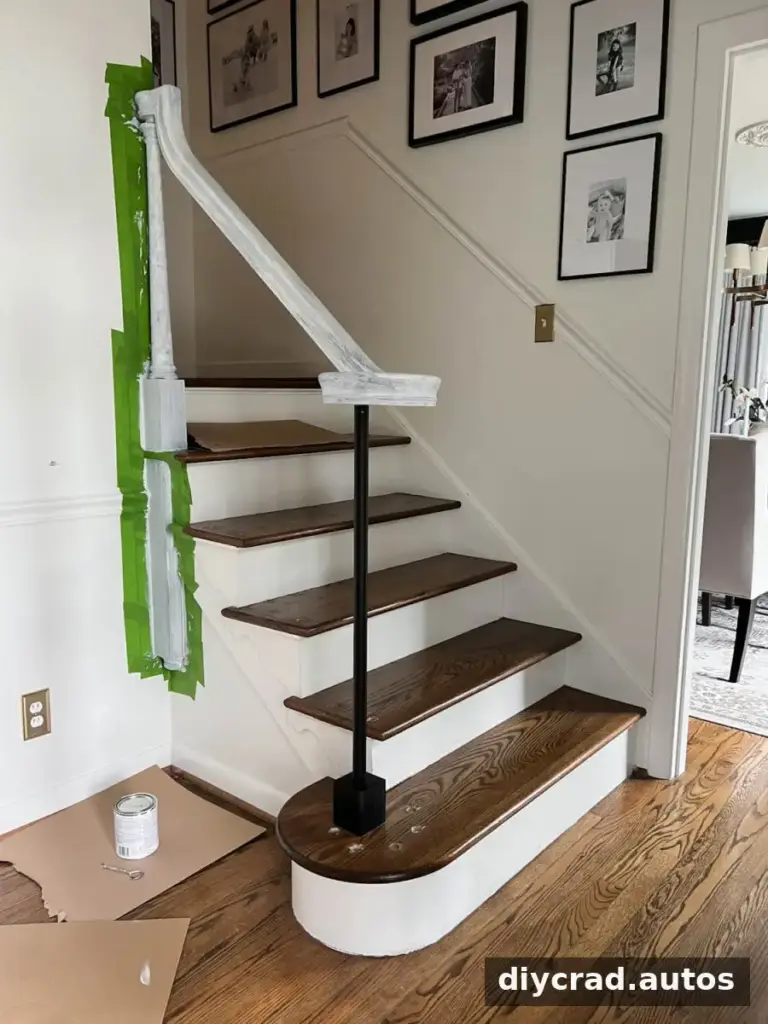
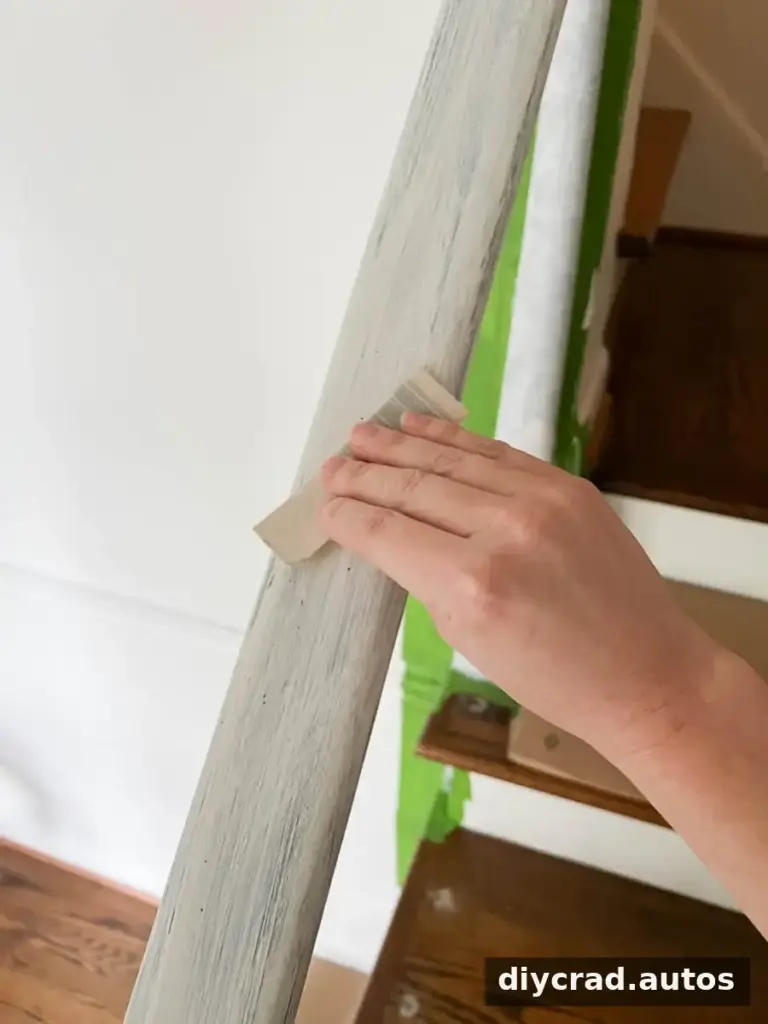
After the primer dries, smooth it with fine-grit sandpaper and wipe away dust. Flexible sandpaper can help follow curves and grooves. Apply two coats of waterborne alkyd paint, allowing each coat to dry according to the product instructions. Satin sheen was used for this project.
Waterborne alkyd paint is intended to form a durable finish suitable for frequently handled surfaces. Follow the label for application, ventilation, drying, and curing guidance; avoid putting the railing back into heavy use before the finish has cured.
Step 6: Install the New Balusters
Once the handrail paint is dry—overnight was used in this project—slide a stair shoe onto a baluster. Apply construction adhesive in the handrail and tread holes, insert the upper end into the handrail, and angle the lower end into the tread opening.
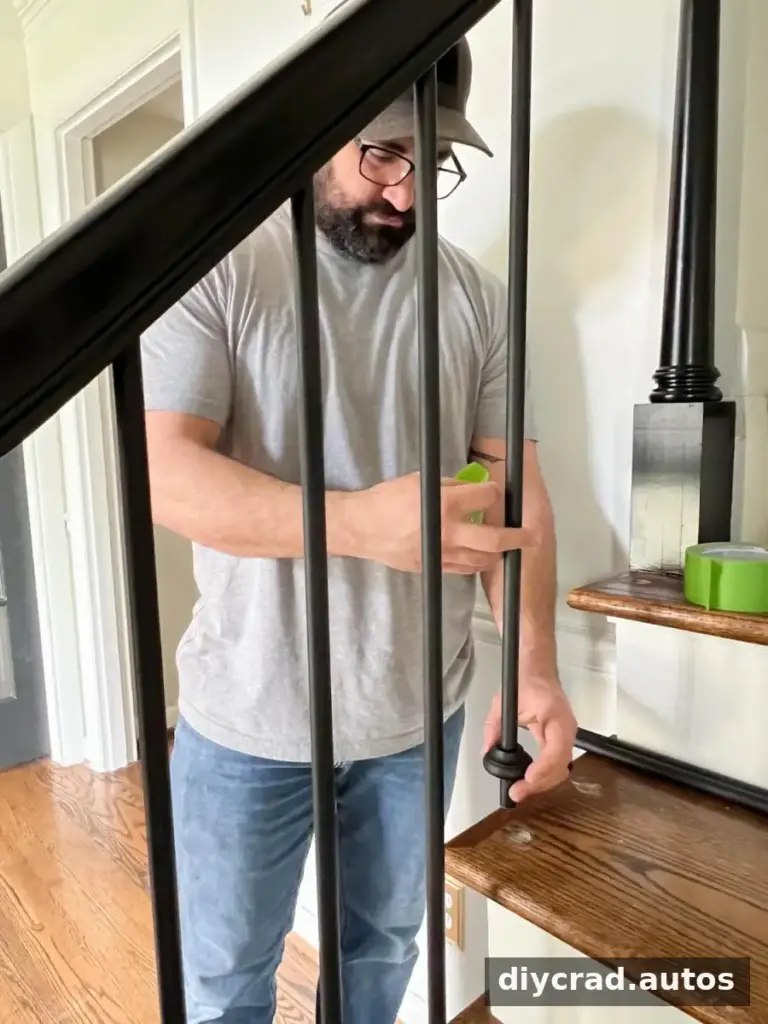
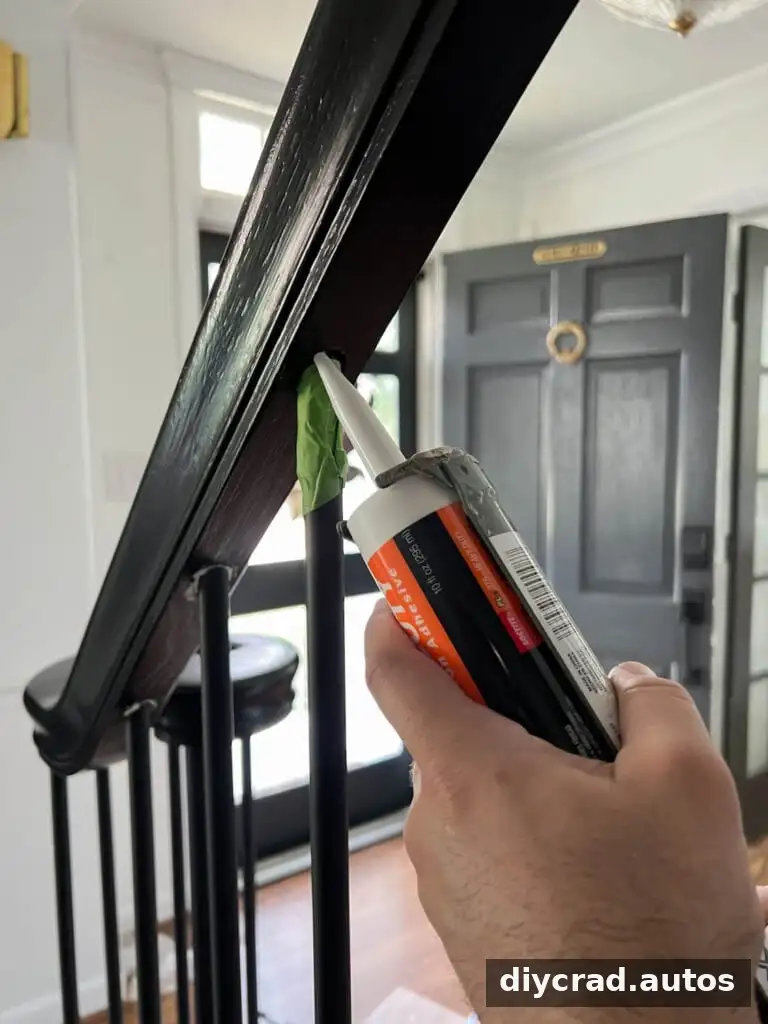
Add a small amount of adhesive to the handrail opening for extra security. Painter’s tape can protect the metal finish from adhesive; remove it after application. The project used 3/4-inch self-drilling wood screws beside the iron balusters to keep them snug in the tread holes.
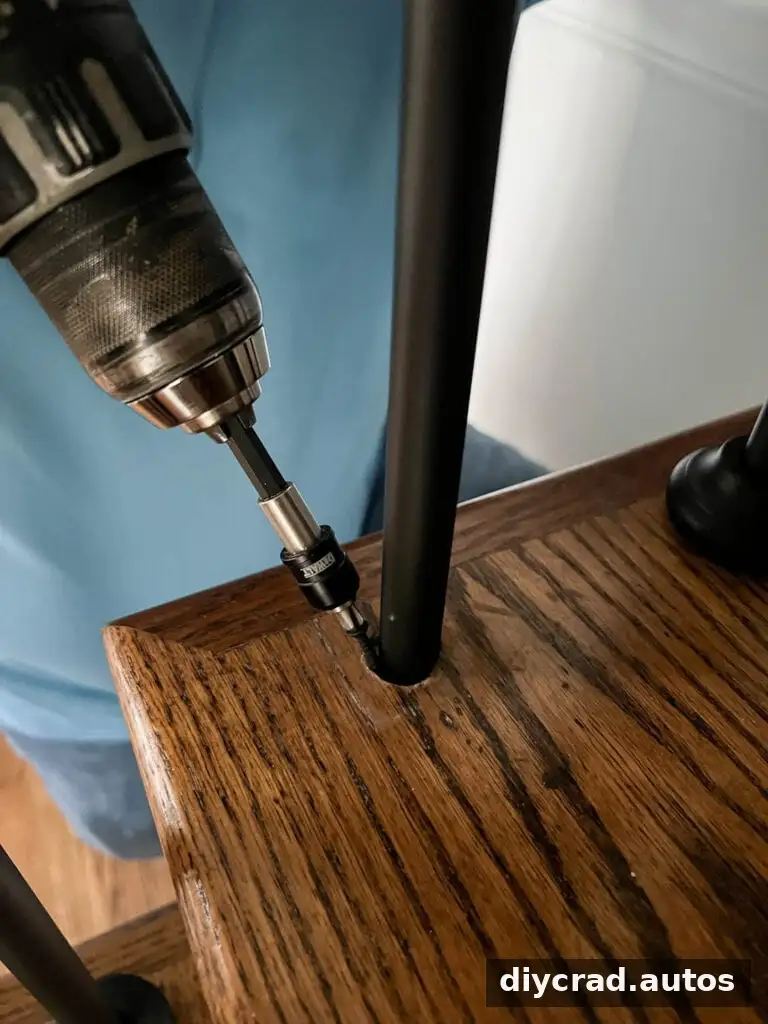
Slide the stair shoes down to cover the tread openings. Allow the construction adhesive to dry for at least 24 hours before touching up paint or putting the railing back into regular use.
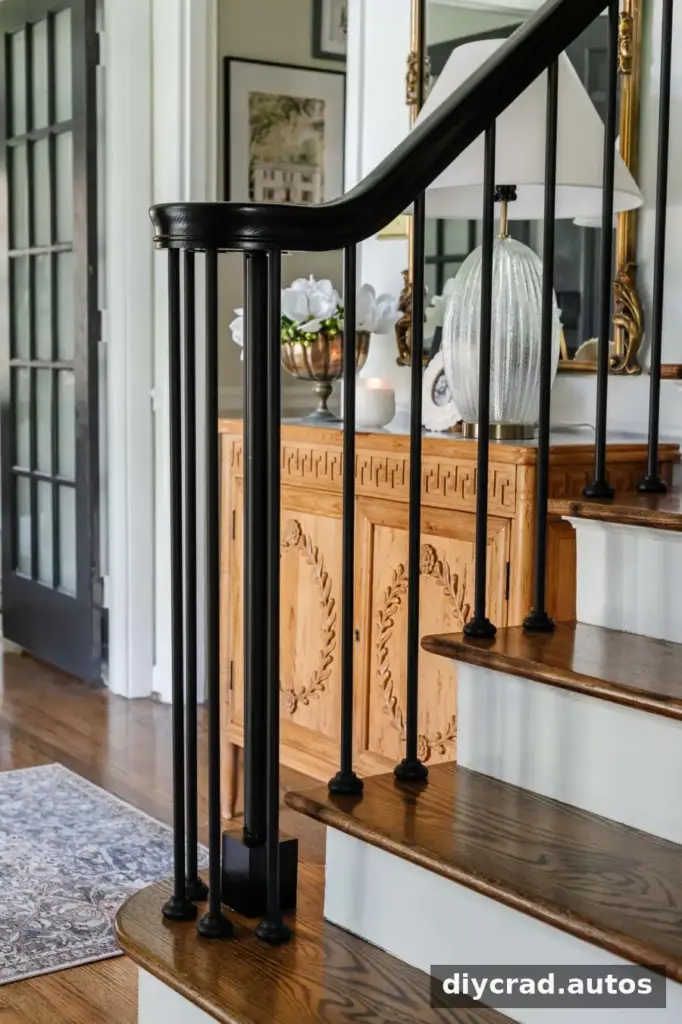
DIY Stair Makeover: The Finished Railing
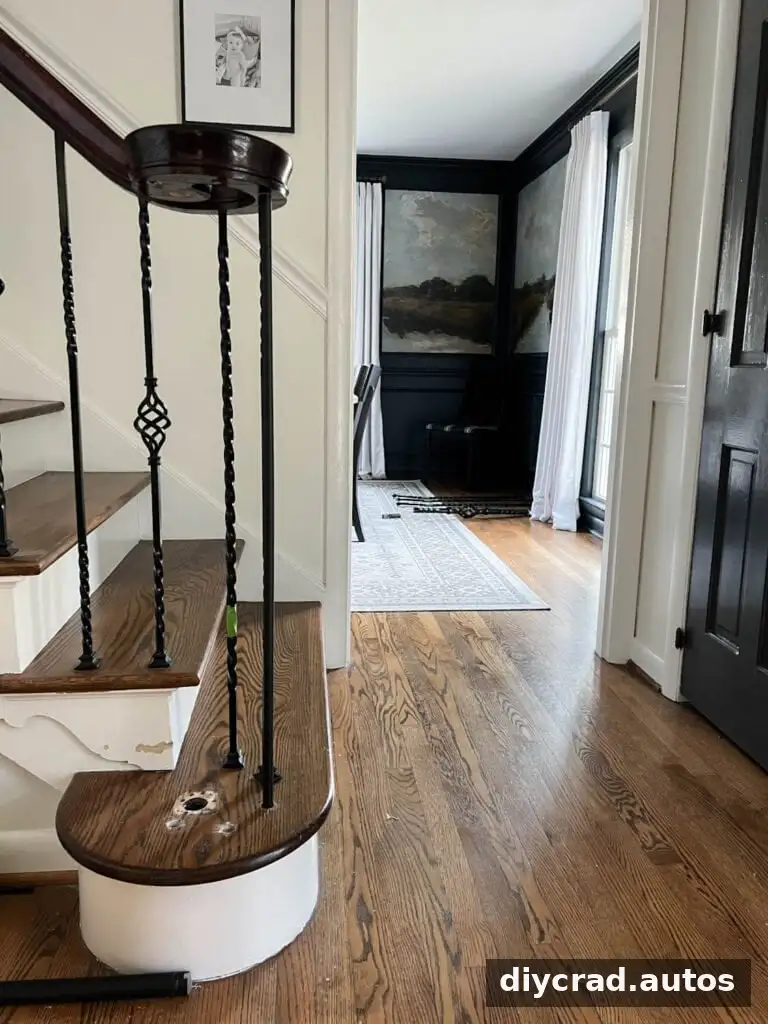
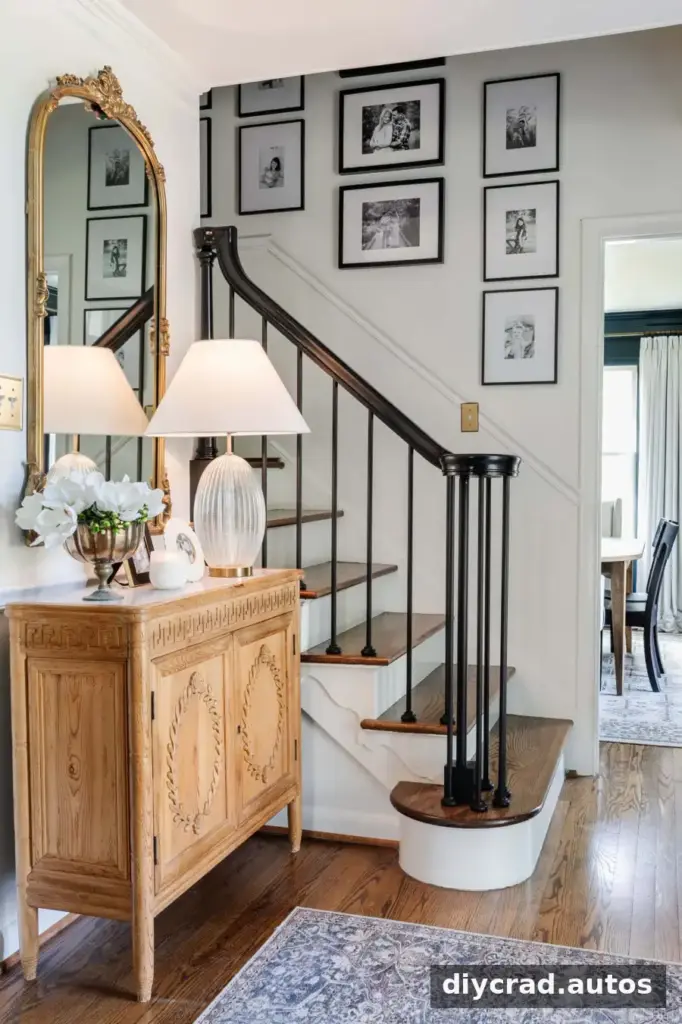
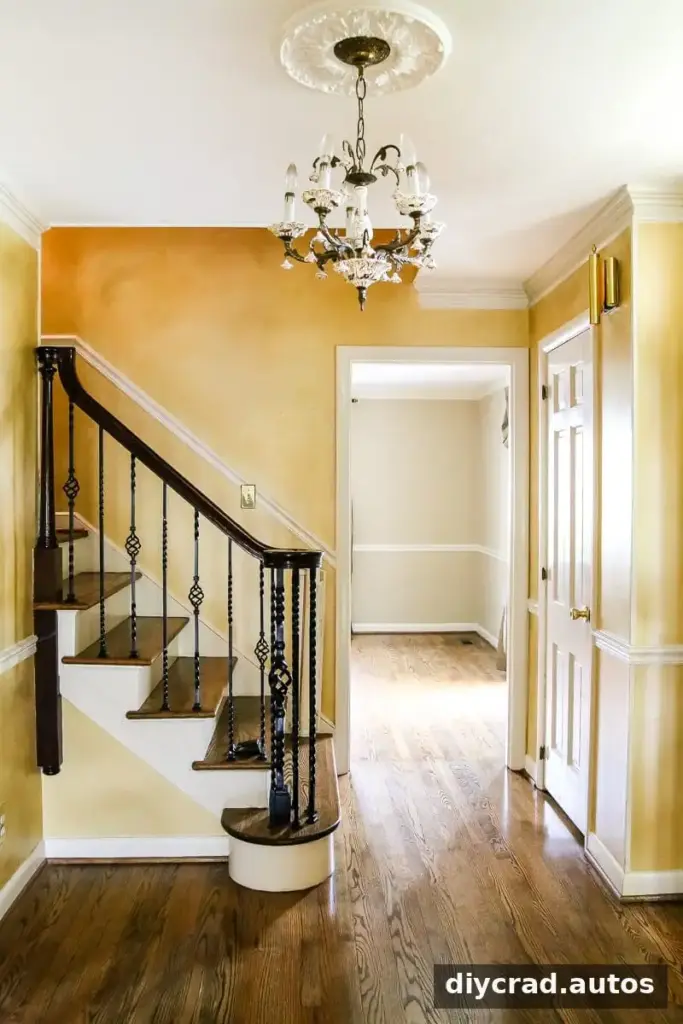
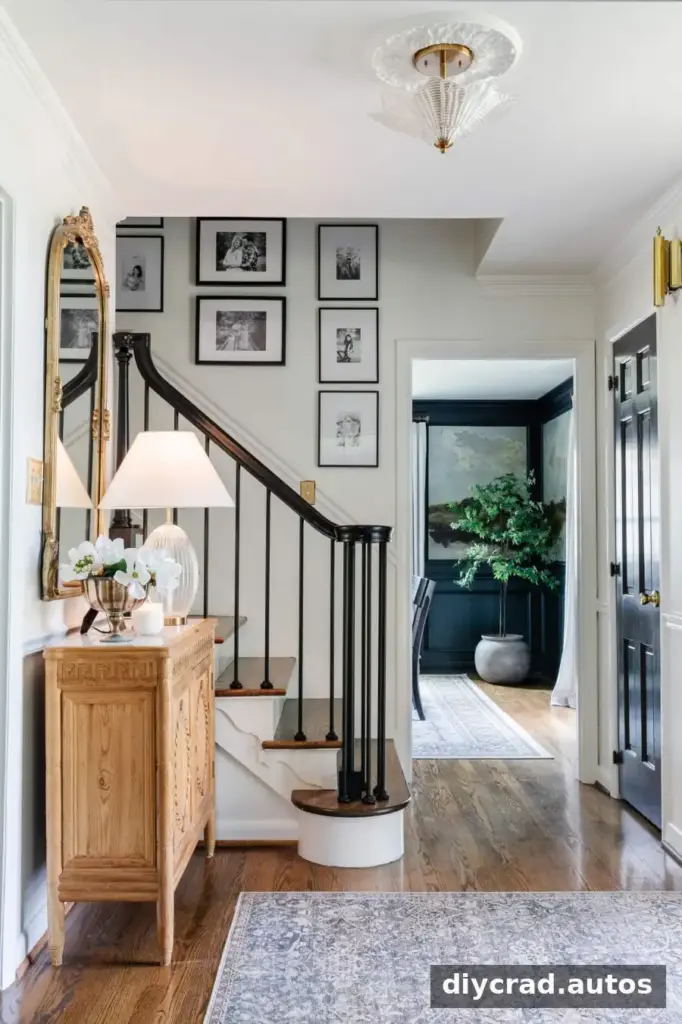
Replacing ornate balusters with plain black metal ones and repainting the handrail can give a staircase a cleaner, more current appearance while retaining the existing railing structure. A stair runner may also improve comfort and traction, but select one suitable for stairs and install it securely.
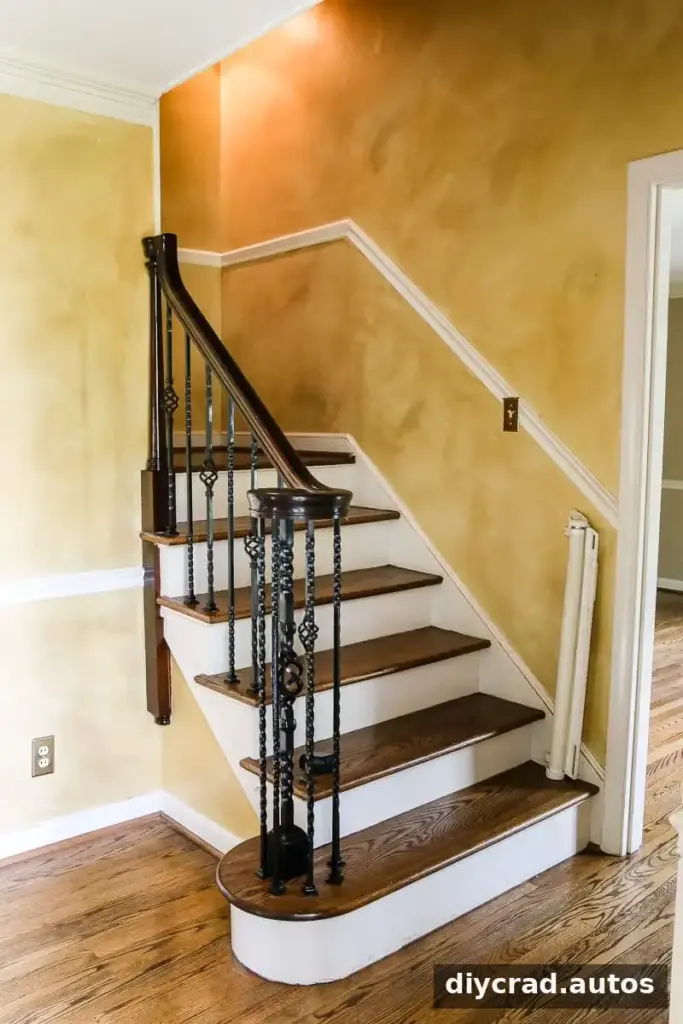
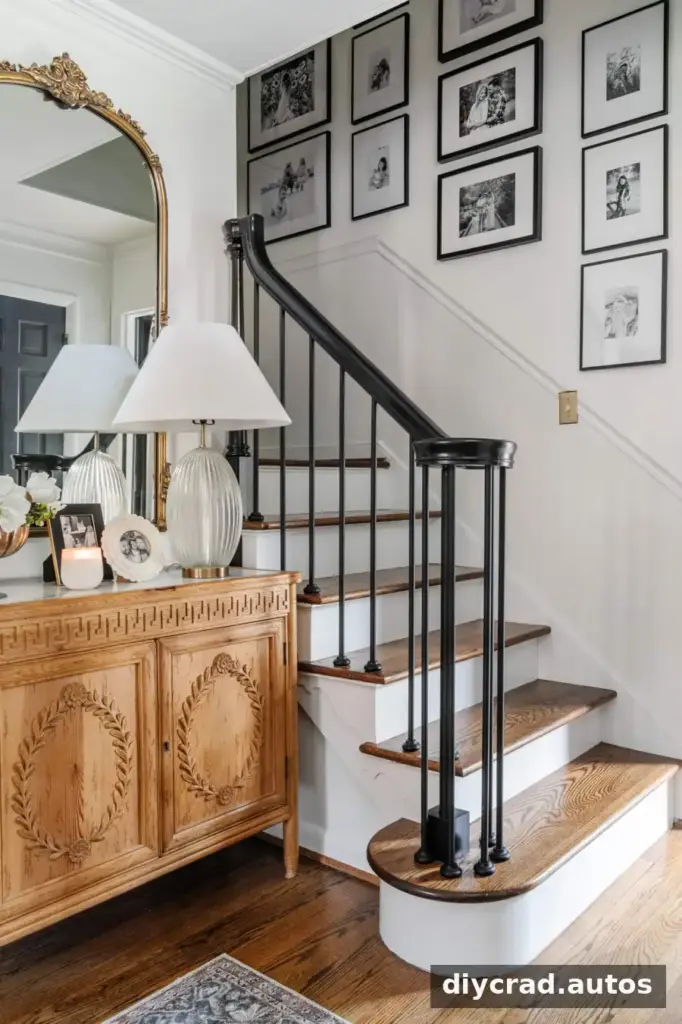
Paint and updated railing components can make a noticeable difference without a full staircase replacement. Before considering the project complete, check that every baluster is secure, the handrail is stable, and paint and adhesive have had enough time to dry and cure.
How Much Does It Cost to Replace Stair Spindles?
The total reported cost for this project was $383. That amount included tool rental, saw blades, primer, paint, adhesive, new balusters, a newel post, and disposable materials. Renting the high-powered saw helped avoid the cost of purchasing a tool used for a single project.
Your cost will depend on the number and type of balusters, the length of the railing, local tool-rental prices, and whether the newel post or handrail also needs replacement. Measure the staircase and price the main materials before beginning so you can set a realistic budget.
Frequently Asked Questions
What is the difference between balusters and spindles?
The terms are often used for the vertical pieces that fill the space between a stair tread or lower rail and the handrail. Usage can vary: balusters typically rest on a tread or footing, while spindles may be supported by a horizontal lower rail.
How far apart should stair spindles be?
A general rule cited for this project is three balusters per foot, or about every 4 inches. This is not a substitute for local building requirements. Check the rules that apply to your home and measure the finished openings before installation, especially if children may use the stairs.
What is the standard size for stair balusters?
Common square wood baluster sizes listed for this project are 1 1/4 inches, 1 3/4 inches, and 1 5/8 inches. Confirm the dimensions and profile of the parts you are buying, since size, shape, and fit vary by design.
Final Tips for Replacing Stair Spindles
To replace stair spindles successfully, inspect the existing railing, choose compatible parts, label removed pieces for measuring, and test-fit everything before painting or applying adhesive. Work safely, preserve handrail support during removal, and verify local spacing and installation requirements before using the finished staircase.

